Tag Archive for: el paso

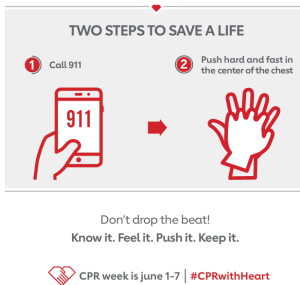
Learn Two Steps to Save a Life with Hands-Only CPR.

Join a Nation of Heartsavers on June 1-7 for National CPR and AED Awareness Week.

Did you know that 70 percent of out-of-hospital cardiac arrests happen in homes? Statistically speaking, if you are called upon in an emergency, you will most likely be trying to save the life of someone you love: a parent, a sibling, or a friend.

CPR increases a person’s chance of survival by double or even triple. Consequently, bystanders play an integral part in increasing survival from cardiac arrest. Because of this, we are asking you to please take 90 seconds of your day to learn the lifesaving skills of Hands-Only CPR. We are pleased to support the American Heart Association and its important mission to increase survival from cardiac arrest.

According to the CDC, heart disease is the leading cause of death in the United States, with over 600,000 deaths each year. Promptly and adequately performed CPR can dramatically improve someone’s chance of survival. A leading cause of death in children ages 4 and under is drowning. CPR certification for parents and childcare providers can help to decrease the loss of life.

In just 90 seconds, you can learn the two simple steps to Hands-Only CPR. Share these Hands-Only CPR resources with your family, friends, co-workers, and your community.

Please watch the video any day June 1-7. Then, share this important link with family and friends and tag us on your posts on Facebook, (@AHACPR) and Twitter (@HeartCPR) using the hashtag, #CPRWithHeart. We would like 100% student participation.

For more comprehensive training, you can find our CPR, First Aid, AED, and Stop the Bleed training schedule by visiting www.pro-action.org/cpr.

Thank you for joining the next Generation of Heartsavers!

How to “Stop the Bleed”

Stop the Bleed

Stop the Bleed is a national awareness campaign and call-to-action. Bleeding control training is intended to cultivate grassroots efforts that encourage bystanders to become trained, equipped, andStop the Bleed Tourniquet application empowered to help in a bleeding emergency before professional help arrives. Uncontrolled bleeding is the number one cause of preventable death from trauma. The more El Paso residents who know how to apply bleeding control techniques, the greater the chances of surviving.

No matter how fast the first responders arrive, bystanders will always be first on the scene. A person who is bleeding can die from blood loss within five minutes, therefore it is important to quickly stop the blood loss. Those nearest to someone with life-threatening injuries are best positioned to provide first care. You can help save a life by knowing how to stop bleeding if someone, including yourself, is injured.

Take a class today! Many organizations in El Paso, Texas, including ProAction Emergency Services Institute, offer free and low-cost stop the bleed training. You can learn more by calling 915-532-2771.

Learn the Steps of Bleeding Control

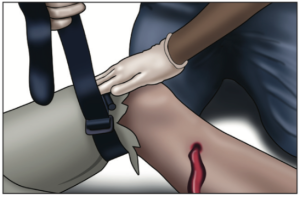
Step 1: Stop the bleeding. Now! Expose the wound. Tear clothing away. Immediately apply firm, direct pressure to the wound using gauze, clean cloth, an elbow, hand, or knee — whatever it takes to slow or stop the hemorrhage. If the pressure does not stop the bleeding and the dressing becomes soaked with blood, you will need to apply a tourniquet.

Step 2: Apply the Tourniquet. If the bleeding doesn’t stop, place a tourniquet at least 2-3 inches from the wound. The tourniquet may be applied and secured over the clothing.

Step 3: Adjust the tourniquet. Be sure the tourniquet is at least 2-3 inches from the wound. The tourniquet should be placed between the wound and the heart. Do not apply the tourniquet over a joint, such as an elbow, knee, or ankle.

Step 4: Manually tighten the tourniquet. Clip the sides of the tourniquet together using the buckle and pull on the end strap. Tighten as much as you can.

Step 5: Use the windlass rod to further tighten the tourniquet. Twist the windlass rod in one direction to increase the pressure to stop the bleeding.

Step 6: Secure the windlass rod. Using the windlass clip, secure the rod so that it does not unwind. If there is a velcro strap, also use that to secure the windlass.

Step 7: Make a note of the time. Note the time that the tourniquet was applied. This is important because leaving a tourniquet on too long can cause damage to the tissue. A time-stamp will help caregivers know which patients to treat first.

Do you represent a school or non-profit looking for STOP THE BLEED training? Apply for a free bleeding control course HERE.

More information: view Stop the Bleed Booklet